Java Servlets are basically objects which sends back a response based on the incoming request. They are basically used to extend the functionality of a web server. To implement a servlet, you need to have the servlet-api.jar and since we’re using MySQL for DB authentication, you also need to have the mysql-connector-java-bin.jar. Without these two, your application won’t run.
If you’re using Netbeans and have GlassFish Server installed, the servlet-api.jar will already be there in your library. If no, you can manually add it. For MySQL connectivity, you will need to manually add the JAR. If you’re using Eclipse, to create a Servlet project, you need to have the Java Web plugin and Apache Tomcat (or any other server for the matter) installed. If you’re not aware of how to check the MySQL connectivity from NetBeans, you can check out this post.
How To Create A Servlet Project In Netbeans
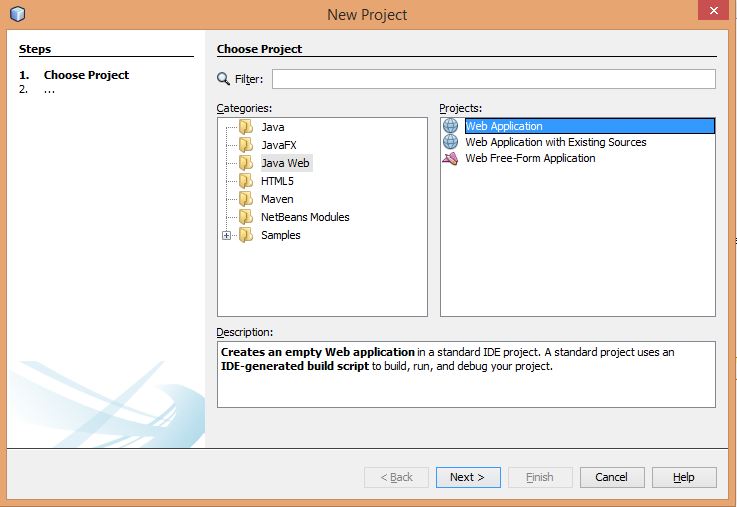
The first thing that you need to do to create a servlet project on Netbeans is choose Java Web from the categories. After that, select Web Application.
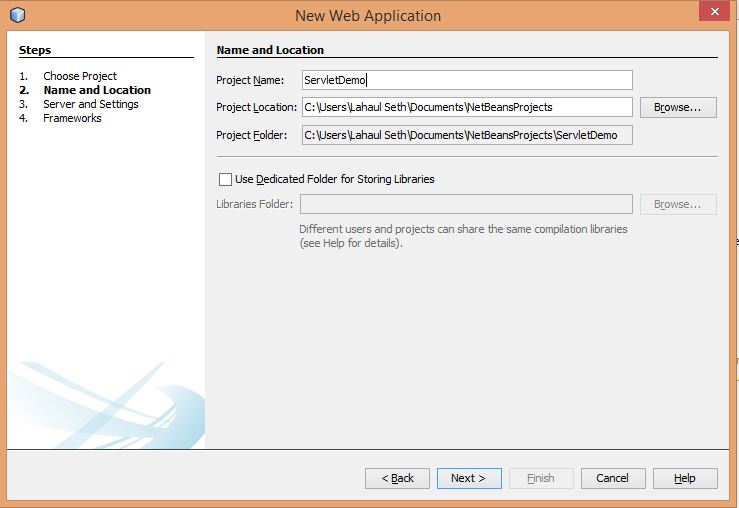
Next step is giving a suitable project name.
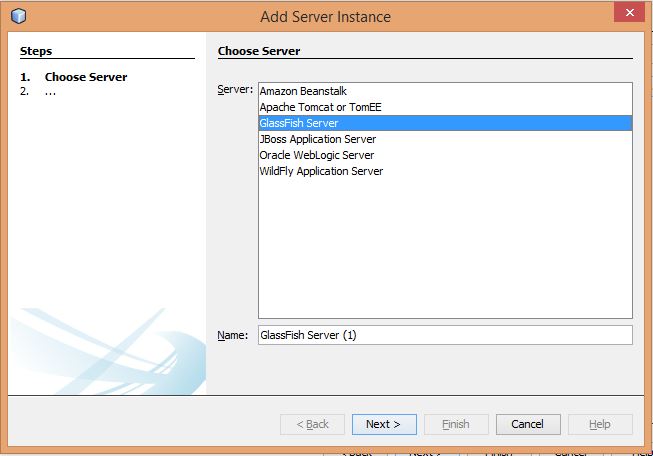
The next step is adding a suitable server. GlassFish comes inbuilt with NetBeans.
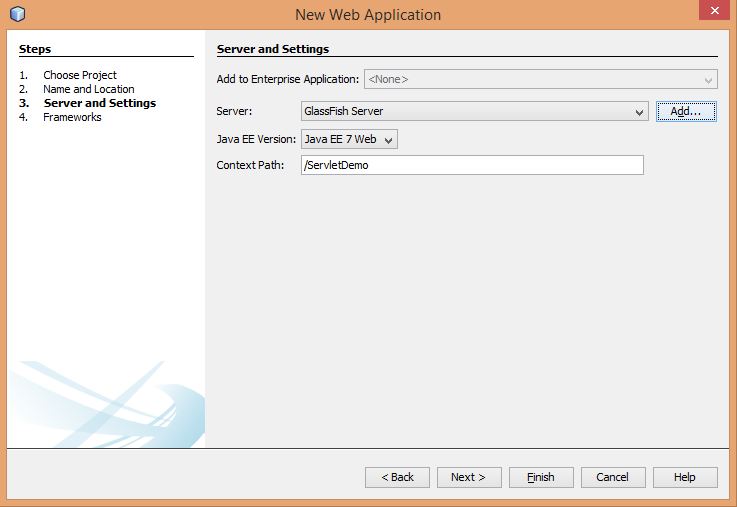
Some of the other server options that you get are :
- Amazon Beanstalk
- Apache Tomcat
- JBoss Application Server
- Oracle Weblogic Server
- WildFly Application Server
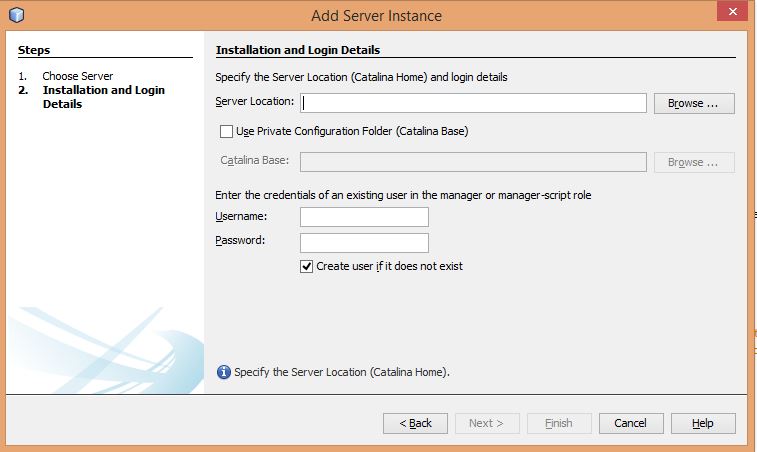
If you select any other server, you will need to provide the path to it’s installation folder.
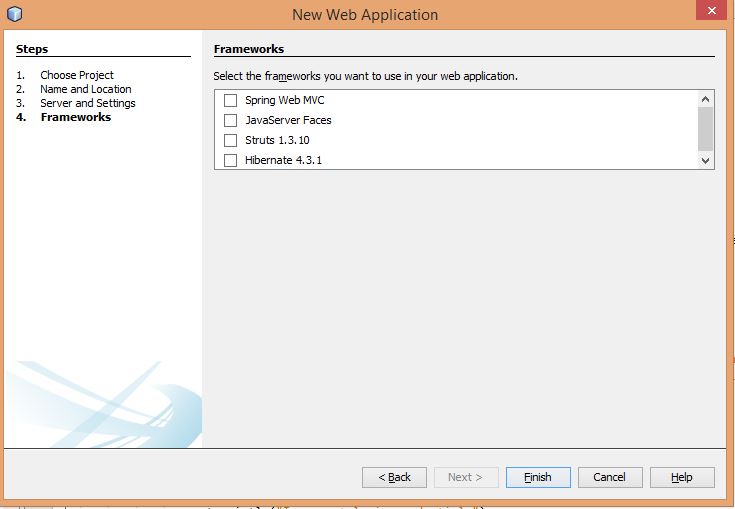
The next step is selecting frameworks. For now, since we’re not using any, we can just click on Finish.
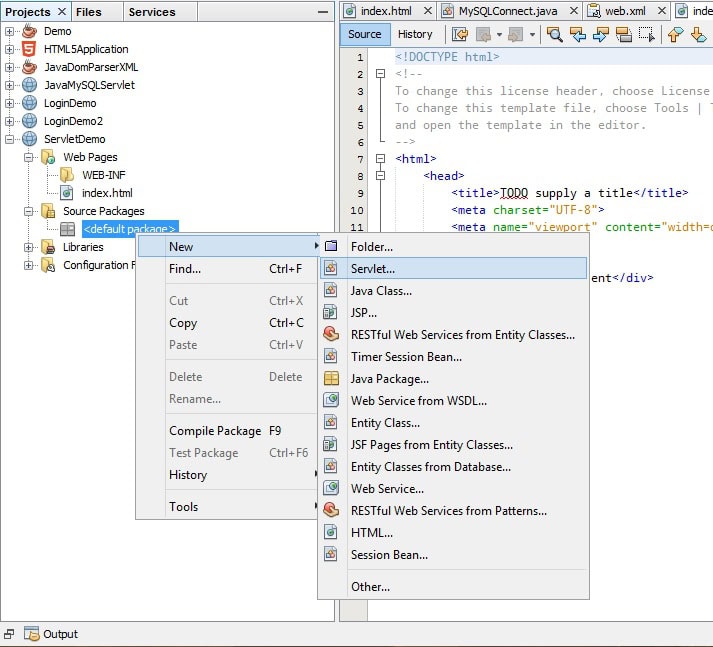
After your project is created, you will need to go to the Source Package. Under <default package>, right click and you will get an option of adding a servlet.
The next thing that you have to do is give a suitable servlet name and configure the servlet deployment name. You will need to give the name of the servlet with which it’s going to be deployed and also the url. Also, make sure to check this option – ‘Add information to deployment descriptor (web.xml)‘. This option will add a xml file (web.xml) under WEB-INF.

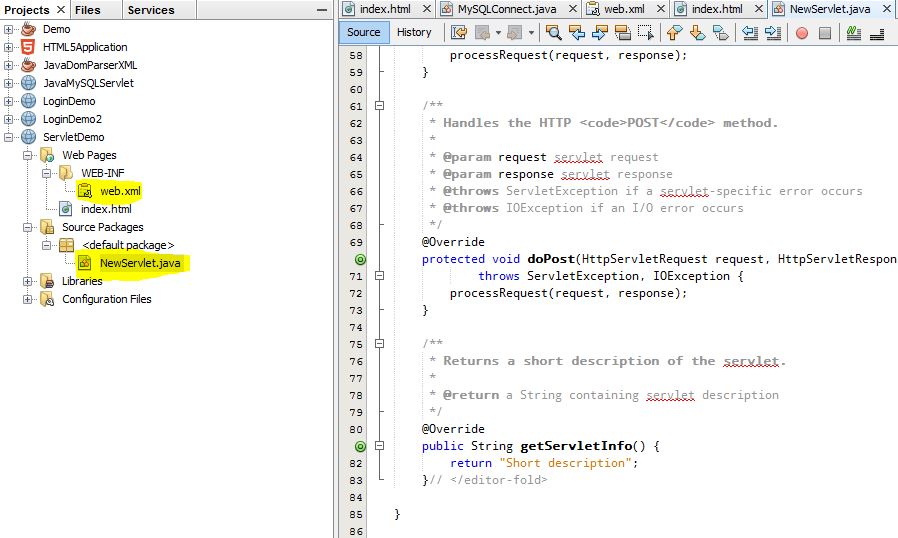
Once you’re done, click on Finish and Netbeans will create the servlet java file and also the web.xml.
The next thing that you will have to do is add the mysql-connector.jar. If you’re using GlassFish, servlet-api.jar will already be there. If not, you can download it and manually add it. To add a JAR, right click on Libraries and click on Add JAR/Folder.
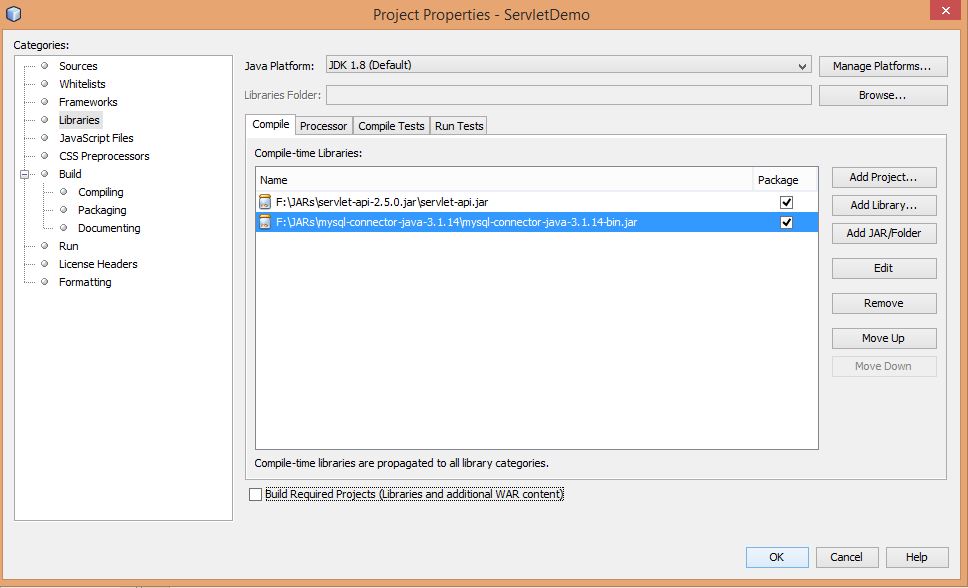
Once you have done this, your JARs will get added to the Libraries.
Tech Tip : Need to catch up your coding work urgently ? Get an instant access to your online private work space on your preferred device(PC/Mac/android/iOS) to build/test web projects online with remotely accessible virtual PCs from CloudDesktopOnline, You can also access complete MS office on the same work space by visiting O365CloudExperts.com. Try out hosted SharePoint and Exchange from Apps4Rent to enhance your team collaboration.
Building the Application
Now that you’re all set, you can get into the coding part. The first thing that you need to do is modify the servlet file. You will need to get the data from your HTML file and authenticate it against the MySQL database. For utilising MySQL, I have installed EasyPHPDev Server. You can just run it and then connect to the DB. Always make sure the server is running, before trying to run the project.
Here’s the servlet code that I have used.
import java.io.*;
import javax.servlet.http.*;
import javax.servlet.*;
import java.sql.*;

/**
 * Servlet implementation class MySQLConnect
 */

public class MySQLConnect extends HttpServlet {

    private static final long serialVersionUID = 1L;

    @Override
    protected void doPost(HttpServletRequest request, HttpServletResponse response) throws ServletException, IOException {
        response.setContentType("text/html");
        PrintWriter out = response.getWriter();
        String user = request.getParameter("user");
        String pass = request.getParameter("pass");
        try {
            Class.forName("com.mysql.jdbc.Driver");
            Connection conn = DriverManager.getConnection("jdbc:mysql://localhost:3306/javademo", "root", "");
            PreparedStatement pst = conn.prepareStatement("Select user,pass from login where user=? and pass=?");
            pst.setString(1, user);
            pst.setString(2, pass);
            ResultSet rs = pst.executeQuery();
            if (rs.next()) {
                out.println("Correct login credentials");
            }
            else {
                out.println("Incorrect login credentials");
            }
        }
        catch (ClassNotFoundException | SQLException e) {
            e.printStackTrace();
        }
    }
}
The next thing that you need to do is write the index.html. Here’s a simple form I that I have written.
<!DOCTYPE html>
<html>
    <head>
        <title>Login form</title>
    </head>
    <body>
        <form method="post" action="MySQLConnect">
        Username :<input type="text" name="user" /><br/><br/>
        Password :<input type="password" name="pass" /><br/><br/>
        <input type="submit" value="Login" />
        </form>
    </body>
</html>
After you’re done with the HTML file, you will need to modify the web.xml file. Here’s how I have used it.
<?xml version="1.0" encoding="UTF-8"?>
<web-app version="3.1" xmlns="http://xmlns.jcp.org/xml/ns/javaee" xmlns:xsi="http://www.w3.org/2001/XMLSchema-instance" xsi:schemaLocation="http://xmlns.jcp.org/xml/ns/javaee http://xmlns.jcp.org/xml/ns/javaee/web-app_3_1.xsd">
    <servlet>
        <servlet-name>MySQLConnect</servlet-name>
        <servlet-class>MySQLConnect</servlet-class>
    </servlet>
    <servlet-mapping>
        <servlet-name>MySQLConnect</servlet-name>
        <url-pattern>/MySQLConnect</url-pattern>
    </servlet-mapping>
    <session-config>
        <session-timeout>30</session-timeout>
    </session-config>
</web-app>
Now that your code is ready you can build the project and run it. If the authentication fails, you will get a message of “Incorrect login credentials”. If it passes, you will get a message of “Correct login credentials”.
So, that’s it for this tutorial, stay tuned for more.
