Since I have started blogging, I have gotten well versed with web development languages like PHP & MySQL along with HTML, CSS and Javascript. So, for the last couple of weeks I have been trying out Java, specifically Java Applications which are standalone programs that can run on any computer provided you have JDK installed.
The quickest way to learn a new programming language is to do projects on them. A while back, I did a PHP project. So, my main goal was to implement the same project using Java. It is easier because the database structure would remain same, only the GUI would be implemented in Java.
Creating a Java Application
So, the first thing that I needed to do was creating a Java Application project. To me, NetBeans and Eclipse are more or less same. Anyway I went with NetBeans. So, the first step would be to create a Java Application project.
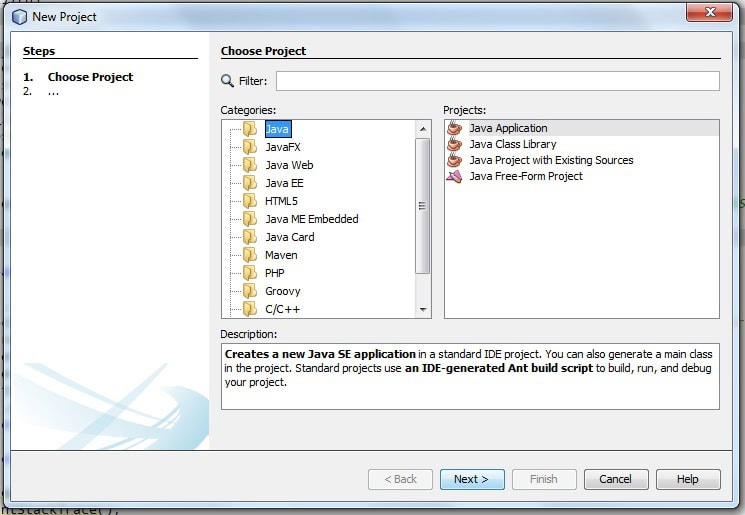
Make sure when you enter the name of the project, you disable the option of creating the main class of the project. This would allow you to choose a main class for the project during the building of the project.
Adding JFrame to the Project
Java applications generally work using JFrames. So, In the source package of your folder, create a JFrame Form which will be the login form in this demonstration.
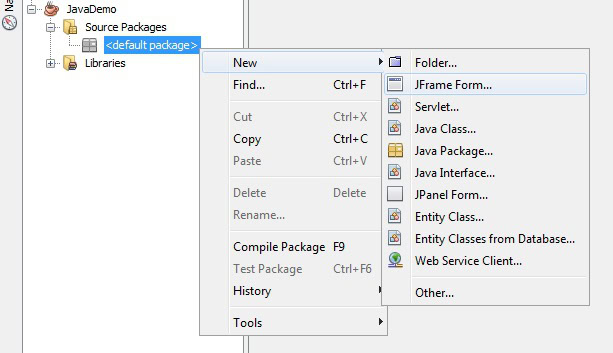
Once you have generated the JFrame form ( say login.java ) , you add the swing components for the validation of username and password.
Create the GUI
You can create a very basic GUI for the login screen of your project like I have done below.

Testing MySQL Connection
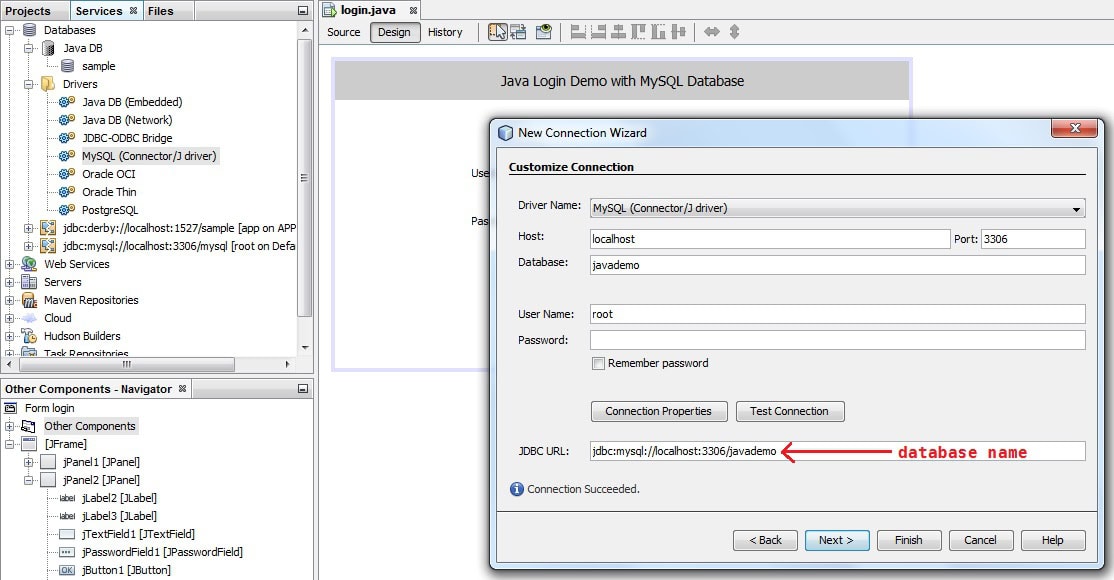
After creating the GUI the only thing left is making the database connection. But, before making the database connection, you can test the connection. And for that you don’t need to write any code.
Netbeans already has the MySQL Connector installed. It is nothing but a JAR file which enables your application to connect with MySQL database. In Eclipse however, you would need to add it as an external JAR.
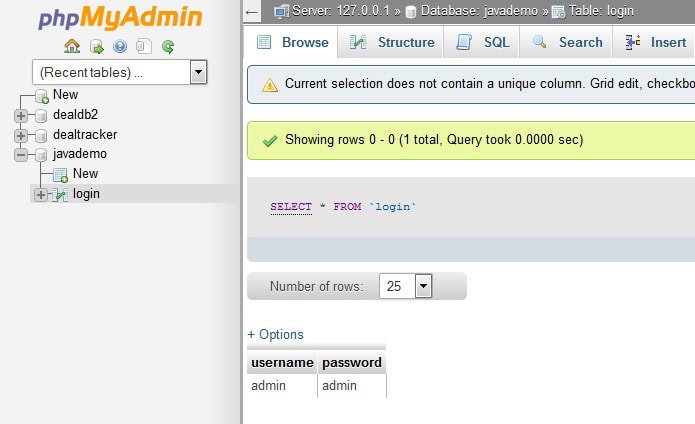
But make sure you have a MySQL server installed before doing so. You can basically create the database and the tables beforehand (which I prefer). One of the reasons I don’t like creating databases and tables during runtime is because you don’t have full control over it. You never know how many of them are being created and before you know it, you will have used up a lot of unnecessary space. It can also data redundancy which you don’t want.
For example what I have done here is created a database name ‘javademo’ and added a table known as ‘login’ which has 2 columns ‘username’ and ‘password’ both of which has values ‘admin’.
Now go to Services and in the Drivers section you will find the MySQL Connector option. Right click on it and click on ‘Connect Using’.
Writing the Code
Since the connection was successful, now we can write the code. But before that you need to add the MySQL connector library to the project [ see image below ]. In the project, you will see a ‘Libraries’ option. Right click on it, and select ‘Add Library’. You will get a list of all the libraries netbeans has. Select ‘MySQL JDBC Driver’ from the list.

For a simple login screen like this, we basically have to write very small and very simple code. Component wise here’s what I used –
- JTextField for Username – jTextField1
- JPasswordField for Password – jPasswordField1
- Submit button – jButton1
- Cancel button – jButton2
Any event occurs on the press of any one of the buttons. First the submit button which will validate the login with data stored in the MySQL database. So, double click on the button and Netbeans will take you straight to the code.
private void jButton1ActionPerformed(java.awt.event.ActionEvent evt) {
   if(jTextField1.getText().length()==0)  // Checking for empty field
      JOptionPane.showMessageDialog(null, "Empty fields detected ! Please fill up all fields");
   else if(jPasswordField1.getPassword().length==0)  // Checking for empty field
      JOptionPane.showMessageDialog(null, "Empty fields detected ! Please fill up all fields");
   else{
       String user = jTextField1.getText();   // Collecting the input
       char[] pass = jPasswordField1.getPassword(); // Collecting the input
       String pwd = String.copyValueOf(pass);  // converting from array to string
       if(validate_login(user,pwd))
          JOptionPane.showMessageDialog(null, "Correct Login Credentials");
       else
          JOptionPane.showMessageDialog(null, "Incorrect Login Credentials");
   }
}
I’m also using a custom function which will validate the login.
private boolean validate_login(String username,String password) {
   try{
       Class.forName("com.mysql.jdbc.Driver");  // MySQL database connection
       Connection conn = DriverManager.getConnection("jdbc:mysql://localhost:3306/javademo?" + "user=root&password=");
       PreparedStatement pst = conn.prepareStatement("Select * from login where username=? and password=?");
       pst.setString(1, username);
       pst.setString(2, password);
       ResultSet rs = pst.executeQuery();
       if(rs.next())
           return true;
       else
           return false;
   }
   catch(Exception e){
       e.printStackTrace();
       return false;
   }
}
You can also add a code to the Cancel button which will close the button when someone presses it.
private void jButton2ActionPerformed(java.awt.event.ActionEvent evt) {
System.exit(0);
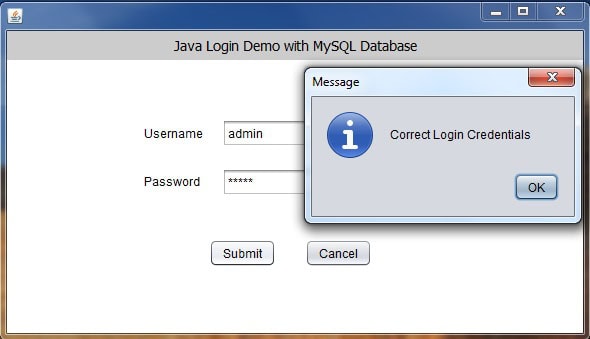
}Final Output
So, now you can run your project. If the field are blank when submit is clicked it will show a message. And it will also show messages for both correct and incorrect validation.