WordPress SEO By Yoast is certainly one of the most popular SEO plugins for WordPress websites. It is a complete SEO package that offers a wide range of features, from optimizing your site’s Meta details to providing page analysis data. A majority of webmasters use this plugin to optimize their websites for search engines.

It offers plenty of options and features that can be easily customized as per your website needs and requirements.
In this article, we are going to show how to install and configure Yoast SEO plugin and make the most of it.
Step 1: Install and activate
You can either manually download it from the WordPress.org website and then upload it to the website or use plugin → “add new” option to automatically install it. Once installed, click to activate it.
Sep 2: Exploring Yoast SEO plugin
Once activated, you would see a new option added in the left sidebar of the WordPress dashboard named “SEO”. When you click on it, you should see around 8 sub-options such as General, Titles & Metas, Social, XML sitemap and more. These are the options that make this plugin one of the best and most widely used.
Step 3: Configuring General Settings
General setting of this plugin has four tabs namely General, Your Info, Webmaster Tools, and Security.
General Tab:
In the first tab “general”, you can take the tour of Yoast SEO and learn the basics of it. Usually, you can leave this tab unchanged.
Your Info:
Moving on to the next tab, “Your info”, it allows you to add your site’s details such as its name and its webmaster’s name. If you do not enter any details here, Yoast SEO will use your website’s title as your site name. Hit “save changes” to save these details.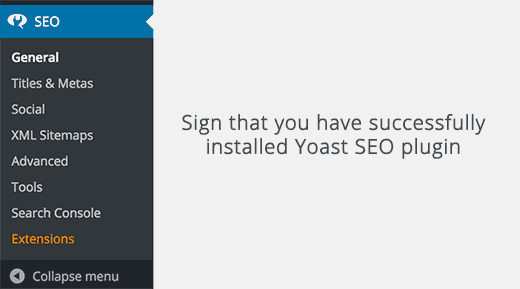
Webmaster tools:
If you have been running a blog or a website for a while, you would be familiar with webmaster tool. Almost every search engine enables webmasters to add their websites with the help of webmaster tool. For those who are not familiar with webmaster tools, this tool allows you to check the insights of the site such as user data, organic searches and more. The option is added in the plugin to ease the process of adding the meta code for your website. Simply add the relevant meta codes in the text boxes given on the tab.
Security:
Security is the last tab on the General settings where there is only one option which disables the advanced part of the WP SEO Meta box. Usually, it is recommended to leave this option checked since unchecking it will avert authors from making modifications such as noidex and redirects which may arise problems in the later stage.
Step 4: Titles and Metas
This is the most important part of this plugin where you add Meta details to optimize your website for the search engines. It also has 6 tabs namely General, Homepage, Post Types, Taxonomies, Archives and other.
General Tab:
In the General tab, you can change the wide settings of the plugins such as force rewrite titles and choose any title separator. Usually, it is better to leave these settings unchanged.
Homepage:
Next comes the Homepage, this is where you add Meta details for your website’s homepage. It allows you to add the relevant homepage title, Meta description, and keywords for your website.
By default, you will see the “title template” option pre-filled with some random “%%sitename%%%page%%%%sep%%%%sitedesc%%” detail. Wondering what is the difference between title template and title?
Well, title template allows you to add a dynamic title, description, and keywords since title may vary depending on the posts and pages.
Post types:
Yoast SEO allows you to set Meta titles, descriptions, and keywords for posts, media, pages, and other custom post types. You only need to add the relevant description and keywords since it comes pre-filled with title template option.
Note: Yoast SEO also adds an SEO Meta box on every post, category, and page, you can manually enter the details on each post and page for maximum SEO benefits.
Taxonomies:
This option allows you to add Meta details for custom taxonomies, tags, post format archives and categories. You can configure Meta title and description but it usually gets overwritten with the Meta details you enter in the SEO meta box in each category and tags.
Archives:
In this tab, you can enter Meta details for the author archives, special pages, 404 pages and date archives.
Note: To enable Meta keywords on your homepage, category, and post, you need to enable “Use Meta Keywords Tag?” on the “other” tab in Titles and Metas.
Step 5: Social
Social, as the name suggests, allows you to add your social media accounts to your websites such as Facebook page, Twitter, Pinterest, and Google+. This is certainly a great feature that enables you to integrate social media into your site without having to add any additional plugin to do so.
Opening the social option, you will find a tab for each social media network to configure each account. Simply add the relevant details and hit save changes.
Step 6: XML Sitemaps
XML sitemaps are essential for a website to get noticed and indexed by various search engines. They help you notify search engines about your website pages and how to prioritize them. This plugin makes it extremely easy for you to add XML sitemaps to your site. The XML Sitemaps is also divided into 5 different tabs namely General, User sitemap, Post types, Excluded posts, and Taxonomies.
You need to ensure that the option “check this box to enable XML sitemap functionality” is checked.
Move on to the next tab i.e. User sitemap, disable author/user sitemap and hit save changes. In the Post Types, you can exclude all the pages or posts that you do not want to add in your XML sitemap. By default the plugin disables media attachments; however, you can configure it as per your requirements and needs.
Excluded Posts tab enables you to exclude any particular page, post or custom types from the sitemaps. All you need to do is fill the relevant post ID and hit save changes.
Step 7. Advanced
In the advanced option, you can configure RSS feed, permalinks, and Breadcrumbs.
Breadcrumbs are great for internal linking and help users and search engines to understand the structure of your website. RSS feed and permalinks can also be customized, if necessary, according to particular specifications.
Step 8: Tools
Tools option gives you various tools to save your plugins settings and export to use it for other websites. It also offers other tools such as bulk editor and file editor that enables you to make any changes manually in the Meta details. However, it is always a bright idea to stay away from these tools provided you know exactly what you are doing.
Step 9: Search Console
This option allows you to connect your Google webmaster tools with your website. Add your site to the webmaster tool and verify it with this plugin.
Congratulations, you have successfully configured your Yoast SEO Plugin. Well, as a matter of fact, the settings of Yoast SEO are quite self-explanatory and can be easily modified. Now you are all set to rank higher in the search engines.
Author Bio :
Emily Johns is a WordPress Developer by profession and writer by hobby. She works Wordsuccor Ltd., Which is expert in Custom WordPress Plugin Development. If you need to hire a WordPress Developer you can connect with them on Google+, Facebook, and Twitter.
