
Among the many YouTube videos that you watch there are undoubtedly some that you watch more than once, either because you find them just that entertaining or because you want to refer to them due to the information they contain. Similarly you may come across other videos that you’d like to be able to watch on other devices – some of which may not be able to access the internet.
If you could save YouTube videos you would be able to watch them offline and on any devices as many times as you like – but as you probably know YouTube doesn’t give you a link to ‘save’ or ‘download’ its videos. That is why you should use Movavi Screen Recorder instead, as it will not only supply you with a workaround: Record the YouTube videos in question directly from your screen so that you can then save them.
The next time you want to save a YouTube video, don’t play it but instead launch Movavi Screen Recorder. As soon as you do you can click and drag your mouse cursor to draw a frame over the YouTube video and set it to record just that area of your screen. After the frame has been drawn you can adjust and refine it, so that it encompasses the YouTube video more precisely.
In the event that you want to play and record the video in full screen, you can instead click anywhere on your screen and expand the list under ‘Capture Area’ in the interface that appears. Under the ‘Full Screen’ section of that list you should see your monitor, and you can select it so that Movavi Screen Recorder will record footage from the entire screen.
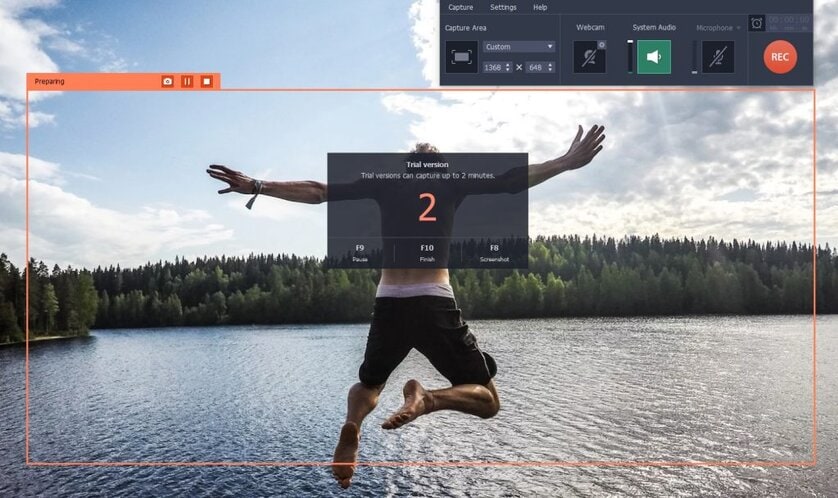
To ensure it is set to record the audio track from the YouTube video you want to save, check that the ‘System Audio’ icon is highlighted. If you need to toggle the icon just click on it once. While you’re doing so, you should also make sure the ‘Microphone’ icon isn’t highlighted, as you don’t want to inadvertently record sounds from it that may interfere with the YouTube video audio.
That is all that is required to set up Movavi Screen Recorder, and to start recording you can press ‘REC’ then play the YouTube video within the following 3 seconds. Once the recording is done click ‘Stop’, and go over the video in the preview window and trim out any parts you don’t need. When you’re satisfied, click ‘Save As’ and select a format to save your video. Rather than manually starting and stopping the recording, you could automate it instead – and by clicking on the ‘alarm clock’ icon you can set a timer or schedule the recording.
As you can see it is easy to save YouTube videos in this fashion, but the fact of the matter is that Movavi Screen Recorder can do a lot more. Try to make it a point to explore its features, as you’ll find they expand your options even further and allow you to record a diverse range of videos according to any specifications.
