MySQL has always been my favorite database because it’s very easy to use. All you have to do is install a local server and get right into it. I recently started experimenting with JSP. For any application, the first thing that I do is build a login page.
Building a login page helps because there’s a database connection involved. You get to know how the data is flowing. What I’ve done is created a simple JSP Login Page with MySQL that will validate the username and password against the database.
You can use any IDE like Netbeans or Eclipse to build a JSP application. I prefer Netbeans over Eclipse.
Before building the application, make sure you have the MySQL Java Connector added to the libraries. Without it, the server (for e.g. Glass Fish Server) will throw an error.
Step 1 : Create The Login Page
Here’s the code for the login page.
<%--
Document : Login
Created on : 28 Feb, 2015, 8:50:26 AM
Author : Lahaul Seth
--%>
<%@page contentType="text/html" pageEncoding="UTF-8"%>
<!DOCTYPE html>
<html>
<head>
<meta http-equiv="Content-Type" content="text/html; charset=UTF-8">
<title>Login Demo with JSP</title>
</head>
<body>
<form method="post" action="validate.jsp">
<center>
<table border="1" cellpadding="5" cellspacing="2">
<thead>
<tr>
<th colspan="2">Login Here</th>
</tr>
</thead>
<tbody>
<tr>
<td>Username</td>
<td><input type="text" name="username" required/></td>
</tr>
<tr>
<td>Password</td>
<td><input type="password" name="password" required/></td>
</tr>
<tr>
<td colspan="2" align="center"><input type="submit" value="Login" />
<input type="reset" value="Reset" />
</td>
</tr>
</tbody>
</table>
</center>
</form>
</body>
</html>
Step 2 : Create The Validation Page
Once you have created the login page, the next thing that you need to do is create the validation page. This page will validate the username and password against the MySQL database.
Here’s the code for the validation page.
<%--
    Document   : validate
    Created on : 28 Feb, 2015, 8:50:26 AM
    Author     : Lahaul Seth
--%>

<%@ page import ="java.sql.*" %>
<%
    try{
        String username = request.getParameter("username");
        String password = request.getParameter("password");
        Class.forName("com.mysql.jdbc.Driver");  // MySQL database connection
        Connection conn = DriverManager.getConnection("jdbc:mysql://localhost:3306/javademo?" + "user=root&password=");
        PreparedStatement pst = conn.prepareStatement("Select user,pass from login where user=? and pass=?");
        pst.setString(1, username);
        pst.setString(2, password);
        ResultSet rs = pst.executeQuery();
        if(rs.next())
           out.println("Valid login credentials");
        else
           out.println("Invalid login credentials");
   }
   catch(Exception e){
       out.println("Something went wrong !! Please try again");
   }
%>
Step 3 : Build And Run The Application
Once you have finished both your login and validate page, you can run the application in the browser. Note that I have added the ‘required’ keyword in both the fields which means you can’t leave the fields empty.
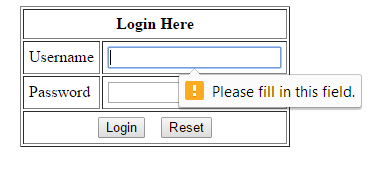 It’s a simple client side validation that prevents the server from additional stress.
3 Areas Where Things Can Go Wrong
1. Adding the MySQL Java Connector
For any application that uses MySQL as a database, make sure you have the API installed. In this case make sure you have added the MySQL Java Connector JAR file.
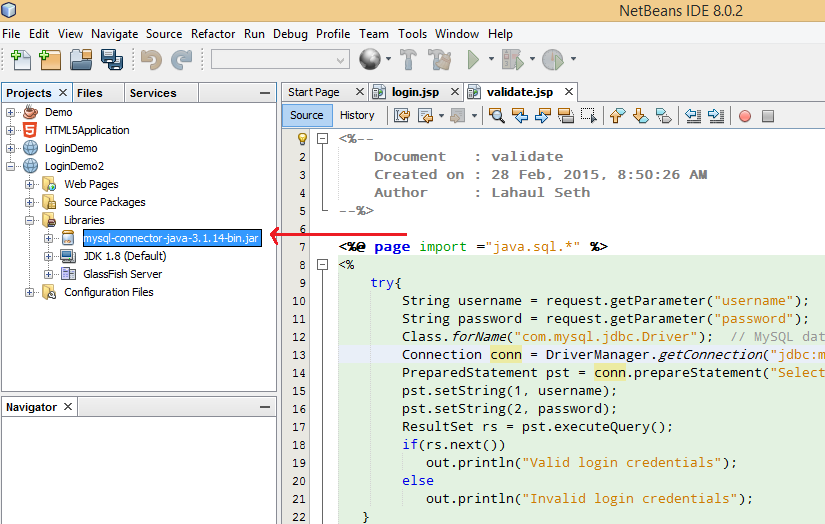
Without the JAR, you won’t be able to connect to MySQL even if you’re server is running.
2. Keep The Database Attributes Correct
While coding any database driven application, always make sure that you have coded the correct database attributes for the SQL queries. The same principle applies here as well. Also, make sure the port through which you’re connecting to database is correct. Or, it will cause all kinds of error.
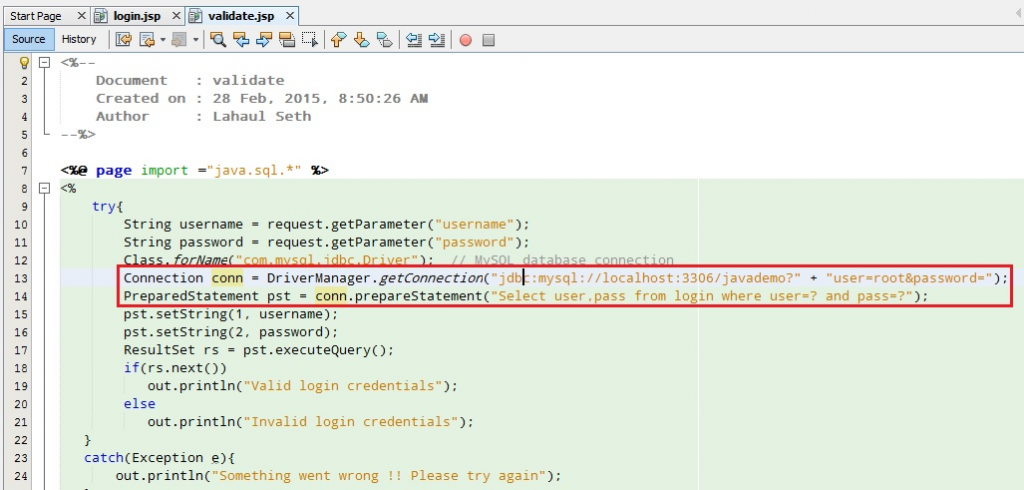
Always make sure that you have written the correct database name, table name and attributes in the SQL queries. When an application becomes bigger as you go further into it’s development, errors like these are very difficult to debug and take a large amount of time.
3. Server Is Running
This is the most important thing to remember for any web application. Even if everything is complete, if your server is not running, the application will not validate anything.
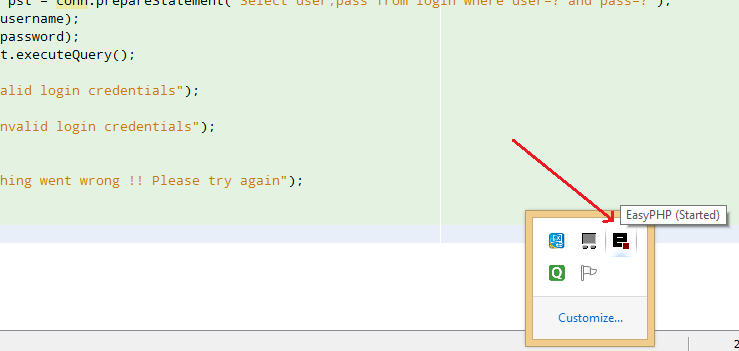
If you’re running a local server like the WAMP Server or EasyPHP Dev Server, make sure the server and the services are running.